Fulfillment Process
From the Program Menu>Item Availability>Contract Fulfillment.

Prep Out – Items that are pre-staged/prepped. (This replaces the paper version of the item prepping process)
Prep In – Items being processed in for final counts and inspection.
Will-Call In – Items being returned by the customer.
Will-Call Out – Items being picked up (will-called) by the customer. (This replaces the paper version of Load Slips)
Loading Out – Items being loaded on a delivery truck. You will be able to see Dispatch Routes and allow by stop or by truck view. Can be used to load or unload a truck.
Loading In – Items being unloaded from delivery. You will be able to see Dispatch Routes and allow by stop or by truck view. Can be used to load or unload a truck.
Transport Out – Items being delivered.
Transport In – Items being picked up.
Departments – Displays contracts that have items from the selected department.
Store – Displays contracts from the selected store.
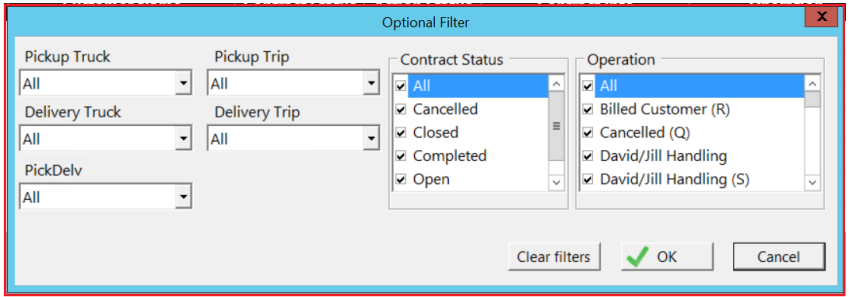
Data Filter – Select the Data filter button to open additional data filters that now allow you to view data in many ways. This includes the Following:
-Delivery and Pickup Trucks
-Delivery and Pickup Trips
-By Delivery, Will Call and All orders
-Contract Status ie Reservation, Open, Closed etc.
-Operations – These can be customized for your operation (See Transaction Operations)
All Contracts – Displays all contracts; by default, this screen will only display contracts requiring action. Checking this box will include contacts that have already been processed.
Add Items: When processing a contract in Fulfillment using a barcode scanner, the employee may scan an item that is not on the contract. This will be displayed in red as an exception, but otherwise handled as if the item was on the contract. Counter System will display these items in the Fulfillment tab as exceptions. If the item needs to be part of the contract, the employee can right-click the exception on the fulfillment tab and select ‘Add Item to Contract’. This will clear the exception and add the item and applicable charges to the contract.
*Note- When adding items to the contract in this way, if you scan the item twice within the contract fulfillment screen, it will ask if you want to remove it when you hit the ‘Exit’ button.

Include Today Check box- This option has been added so that a user working on future dates can check this box to see any orders that are entered for the current day. This will keep them from having to go back to the current date to check orders that have changed or been added to the current day.

Prepping in or Out
1. Select the appropriate action (Out or in)
Select the appropriate tab (Prep, Will-Call, Loading, or Transport) to produce a list of contracts.
Select any additional filters.
Select any contract to proceed with the fulfillment.
Use the list to select each line or all lines (using the check box) and press the Count Out/In button to show completion for the selected items.
For a more detailed view select any line (not the check box) to view the Item Detail Screen. The detail screen provides more detail than the list view.

Clipboard – Will display additional information about the transaction and the customer
Show All Items – Displays all items; by default, this screen will only display items requiring action. Checking this box will include items that have already been processed.
Select All Lines – Will check the box on all visible lines.
Count Out/In – Used when one or more lines have been selected to show completion for the selected items.
Prep Label – Print labels to physically identify inventory ready for customers. (Only available in Prep Out)

From the Item Detail view, click/touch the number under ‘Quantity Required’ (10 in this example) to auto fill the ‘Qty to be Actioned’ box. You can manually adjust the quantity with the up/down buttons.
Add comments to the line item by entering the text in the Action Comments. Comments can be viewed in the Item Detail screen, Action History, Fulfillment Tab in the contract, or from the Fulfillment Manager.
a. Comments can be used to notate damage or any exceptions pointed out by the customer or the employee.
You can move to the next or previous item by clicking/touching the right and left arrows. Pressing the next/previous arrow will save your current entries and move to the next item.
View Action History will show the action history of this selected item.
The calculator and keyboard icons are shortcuts for touch screen users.
Action Status:
Green - Items are ready to be prepped out/in
Yellow - Items are in the process of being prepped out/in
Red - Items have not started the being processed out/in
* Note: Once all items have been prepped out/in, the status will change from red to green and the customer will move off of the main prep tab to either the "Will Call Tab" or the "Loading Tab"
Will Call - Indicates the customer is picking up the items from your store location. On the contract the boxes at the bottom will not be checked for delivery or pickup.
Delivery - Indicates you will be delivering or picking up the items from the customer. On the contract the boxes at the bottom will be checked for delivery or pickup.
Serialized Items
If an item is a serialized item, When counting the item out, you will be shown a list of serialized units.

You can select from the list of available units to be prepped out.

Bulk Serialized Items
If an item in the file record is marked as a bulk serialized item. When counting the item out, you will be taken to a screen showing all the individual records making up that bulk serialized item. Normally, this would only be used if you were using a barcode system to track your inventory. If you are not using a bar code device, then each item would need to be counted out separately.

Metered Items
If the item in the file record is a metered item, When counting the item out, you will be asked to enter the meter out number in the appropriate field. When the item is prepped back in, you will be asked to enter the meter In number.

RFID
You must be licensed for RFID Integration and have network devices set up in order to use this feature. This is designed to be used with devices that are IP portal based.
Another option for fulfilling items is RFID. These scanning devices can be set up by going to Configurations>System Configurations>RFID Network Devices.
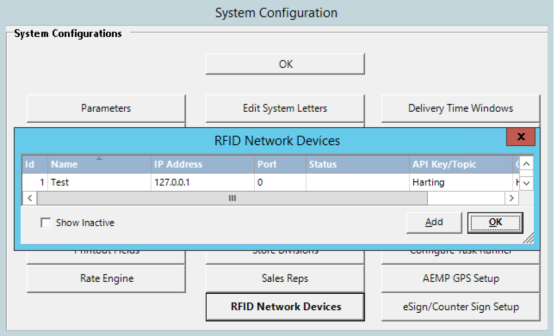
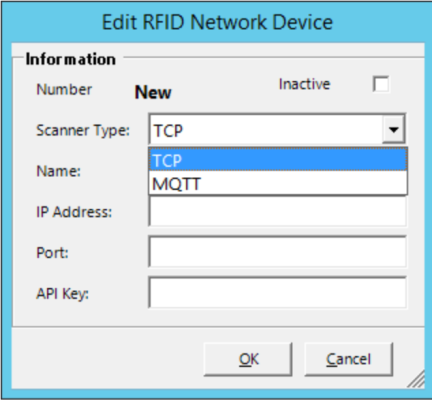
Two different types of scanners (or communication protocols) are supported. TCP scanners only require an IP Address and a Port. MQTT scanners require a name, broker’s ip, client id, and a topic.
Network devices are accessible from any device or workstation within the network.
You can check the status of tags and enroll/disenroll them within File Maintenance. There is an option now within the File Maintenance menu labeled ‘RFID Integration’.

The disenroll option is for disassociating a large amount of tags from damaged or sold items so that they can be recycled and used for other items.
The status option will give you the current status of the tag and if it is enrolled.
Once in this screen, you can set your default RFID device for your user profile at the top left of the screen. Select ‘Start Scan’ and start scanning your tags. The options to ‘clear scanned tags’ and ‘disenroll tags’ are located in the bottom right depending on which screen you’re in.
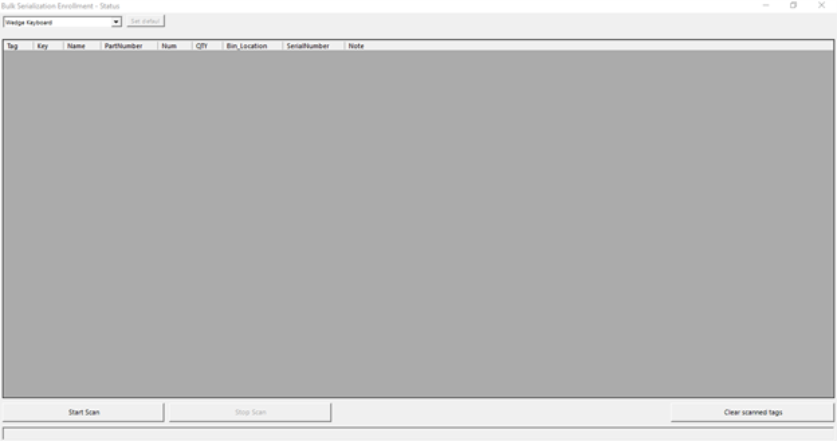
Tag can be enrolled within the item file by going to Tools>Bulk Serialization and choosing the RFID button.

Once you are ready to fulfill a contract, you will open the contract in fulfillment. The green gear allows you to set the default scanner you would like to use. Select the button above that to start the RFID scan. It will prompt you to pick your device. The center of the button will turn green. The green gear allows you to set the default scanner you would like to use.

When the contract is prepped back in, it can be done through the contract or through the blind scan or double-blind scan buttons.

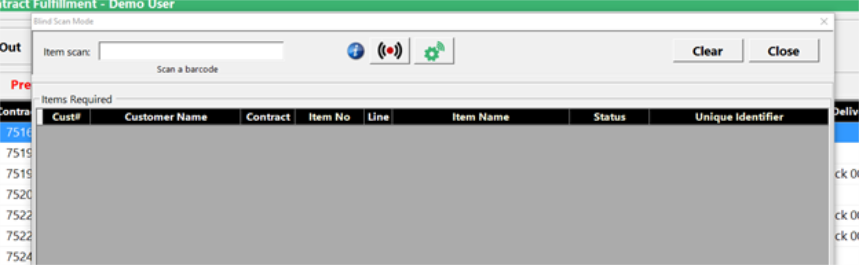
Once scanned, a ‘Pass’, ‘Fail’, or ‘Duplicate’ status will appear to the right of the box with the number of tags that correspond to each status. The ‘Fail’ label can be selected to see why those items failed.
Other Notes:
1. On continuations contracts, they will not show in OUT tabs, onl IN or returns.
2. You can update Operations from with Fulfillment.
3. Parent Contracts will now show line items that are not on a logistic ticket.